#1. 타이포그래피-font

: font-family 등을 사용해서 글꼴 조정 가능

1. font-family : 글꼴 적용

1) 글씨체로 글꼴 적용

=> font-family : (글꼴이름)

2) 해당 글꼴이 적용 안 될 때는 여러 개로 순차적 적용 가능

=> font-family : (글꼴1) , (글꼴2) , (글꼴3)

+ 두 단어 이상일 경우에는 ""로 묶기

ex) font-family : Nanumgothic , "Times New Roman"

3) 포괄적 글꼴 적용 가능

: serif , sans-serif , cursive , fantasy , monospace 적용 가능. 이들은 특정 글꼴 이름이 아니라, 앞에서 언급한 글꼴이 컴퓨터에 없을 경우 적용될 수 있는, 어느 컴퓨터에나 있는 포괄적인 글꼴임.

<!DOCTYPE html>
<html>
  <head>
    <meta charset="utf-8">
    <title>TYPOGRAPHY</title>
    <style>
      h3{text-align : center}
      #type11{font-family : sans-serif ; color: indianred}
      #type12{font-family : serif ; color: indianred}
      #type13{font-family : cursive ; color: indianred}
      #type14{font-family : fantasy ; color: indianred}
      #type15{font-family : monospace ; color: indianred}
    </style>
  </head>
  <body>
    <h3 id="type11">Dark Chocolate and Wafer</h3>
    <h3 id="type12">Dark Chocolate and Wafer</h3>
    <h3 id="type13">Dark Chocolate and Wafer</h3>
    <h3 id="type14">Dark Chocolate and Wafer</h3>
    <h3 id="type15">Dark Chocolate and Wafer</h3>
  </body>
</html>

2. font-weight : 글꼴 굵게 서식 적용

: font-weight : bold  로 설정하면 같은 글꼴인데 굵게만 표시된다.

ex) <h3 font-weight:bold>Dark Chocolate</h3>

3. line-height : 줄간격 서식 적용

: line-height : (숫자)  로 설정하면 해당 태그/id/class 선택자의 줄간격을 설정할 수 있다.

이때 두 가지 방법으로 설정 가능

1) 줄간격의 배수 = 그냥 숫자만 입력

ex) <h2 line-height:2>Hello World</h2>

(기본 줄간격은 1.2 이다)

2) pixel로 지정 = (픽셀 값) px  입력

ex) <h2 line-height:200px>Hello World</h2>

- px는 줄간격의 배수와 달리, 화면 확대나 브라우저 설정을 변경해서 글씨 크기가 바뀌어도 줄간격이 이에 따라 바뀌지 않아서 추천하지 않음


#2. 타이포그래피 - 웹폰트

: 사용자가 갖고 있지 않은 폰트를 다운로드받아서 사용할 수 있는 방법

*폰트의 용량이 너무 크다면 주의해야 한다.

1. 구글의 폰트 사용

: fonts.google.com 에서 폰트 다운로드

2-1) <link> 태그 안의 href url을 포함한 코드를 복사해서 붙여넣기

ex) <link rel="preconnect" href="https://fonts.gstatic.com">

 <link href="~~~~~" rel="stylesheet">  이런 형태의 코드를 <head> 태그 안에 붙여넣는다.

: <link> 태그 안의 href 속성을 이용하면, html 실행 시 href 안의 링크를 불러온다고 한다.

2-2) <style> 태그 안의 font-family 를 포함한 코드를 복사해서 붙여넣기

ex) <style>#아이디이름{font-family:폰트이름}</style>

: 그러나 이 경우는 font-family에 이미 구글 폰트의 글꼴이 있어야만 간단하게 코드 한 줄로 작성할 수 있고, 아니라면 아래의 더 복잡한 2번 방법을 사용해야 한다.

2. 개인이 갖고 있던 폰트를 웹폰트로 바꿔서 사용

-> (생각보다 더 어려워서 따라 실행하진 못했다ㅠㅠ)

<!DOCTYPE html>
<html>
  <head>
    <meta charset="utf-8">
    <link rel="preconnect" href="https://fonts.gstatic.com">
<link href="https://fonts.googleapis.com/css2?family=Train+One&display=swap" rel="stylesheet">
    <style>
      h3{text-align : center}
      #type41{font-family: 'Train One', cursive;}
    </style>
  </head>
  <body>
    <h3 id="type41">Dark Chocolate and Wafer</h3>
    <h3>Dark Chocolate and Wafer</h3>
  </body>
</html>


#2. 조화

CSS 수업에서 하나의 element는 여러 디자인 서식의 영향을 받을 수 있다. 만약 여러 서식이 중첩으로 적용된다면 어떤 규칙에 의해 하나의 서식이 우선적으로 적용되는데, <조화> 부분에서는 어떤 규칙이 적용되는지를 알아볼 것이다.

#2-1. 상속

상속(Inheritance) : 부모 요소가 가진 속성들을 자식 요소가 물려받는 개념

상속이 있는 이유는 코드 작성의 편리함 때문이다.

ex) 문서 전체에 서식을 적용하고 싶다면, 개별 요소에 서식을 적용하는 것보다 <body>나 <html> 태그 하나에 속성을 적용시키면, 이 태그는 모든 태그들의 부모 태그이므로 코드 한 줄로 본문 전체에 서식이 적용된다.


※ 그러나 모든 속성이 상속되는 것은 아니다.

b/c 상속되어야 유리한 속성이 있고, 상속되지 않아야 유리한 속성이 있기 때문이다.

ex) color 속성은 상속됨 <-> border 속성은 상속되지 않음!

* 어떤 속성이 상속되는지는 www.w3.org/TR/CSS21/propidx.html 여기서 확인할 수 있다.


+) 주석 처리 정리

1) 한 줄 단위로 주석 다는 방법

: <!--  comment -->

2) 여러 줄 단위로 주석 다는 방법

: /*

(   comment

    comment     )

*/

#2-2. stylish

: 그동안 배운 CSS를 웹페이지 생산의 관점이 아닌, 소비의 관점에서 보는 방법들 중 하나

= 내가 자주 사용하는 웹사이트의 디자인 서식을 직접 바꿀 수 있는 방법이다.


*방법*

더보기

1. 구글 검색창에 stylish + (브라우저 이름) 검색   

ex. stylish chrome 검색

2. 검색하면 맨 상단에 나오는 Stylish 사이트에 들어가서 프로그램 설치.

3. chrome의 경우 우측 상단의 stylish 아이콘 선택 후, 'find more styles' 영역 클릭하면 사이트로 이동.

4. userstyles.org/styles/browse/google 이 웹사이트에는 google, stackoverflow, netflix 등 다양한 웹사이트에 해당하는 디자인 서식들이 있는데, 두 가지 선택지가 있다:

4-1. 다른 사람들이 올려놓은 서식을 그대로 다운로드 받을 수 있다.

=> 구글 사이트에서 슈퍼마리오 스타일을 다운받았다!

4-2. 내가 직접 웹사이트를 선택하고 서식을 변경할 수 있다.

나는 생활코딩 웹사이트에 서식을 적용하려고 했는데, 강의의 설명을 그대로 따라했지만 서식이 적용되지 않았다; 'Style' 바가 안 나와서 !important 명령을 적용할 수 없었던 듯 하다.

(디자인 서식 뒤에 !important  를 붙이면 해당 서식을 경쟁 관계의 서식보다 우선적으로 적용하도록 한다)


#2-3. cascading

웹사이트는 웹 브라우저, 사용자, 저자의 디자인이 자유롭게 결합될 수 있는 공간이다.

하지만 여러 디자인이 적용되는 경우, 우선순위를 고려하는 규칙이 적용된다.


규칙1.

웹 브라우저 < 사용자 < 저자

: 웹페이지 저자가 지정한 디자인은 사용자와 웹 브라우저가 바꿀 수 없다.

또한 요즘은 사용자가 웹 디자인을 변경할 수 있는 권한을 주지 않는 웹사이트들도 많아서, 사용자가 디자인에 관여하는 면이 점차 줄어들고 있다.
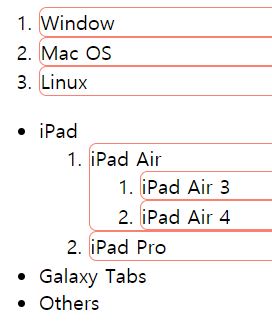
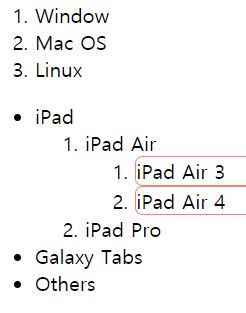
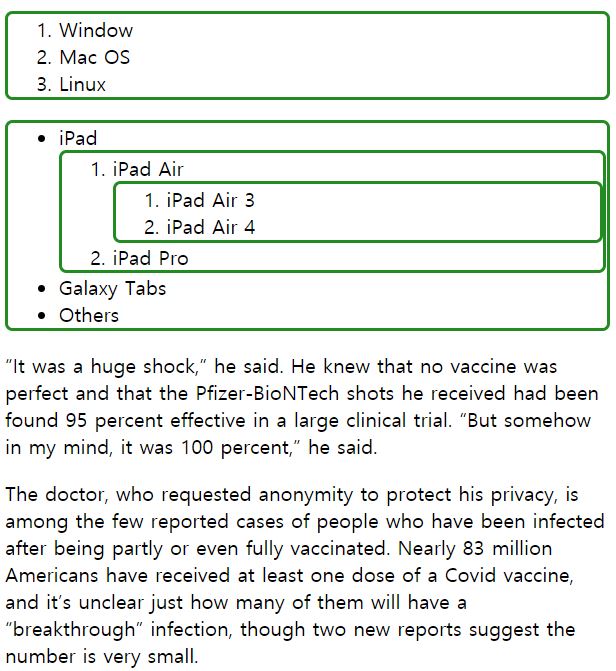
 

규칙2.

tag selector < class selector < id selector < style attribute

: 가장 구체적이고 세부적인 속성이 먼저 적용된다!

id 는 하나의 대상에만 적용되고, class 는 여러 대상에 적용 가능하므로, id가 더 세부적이라고 판단된다.

<!DOCTYPE html>
<html>
  <head>
    <style>
      li {color:tomato ; text-align:center ; font-size:1.5rem} <!-- tag selector -->
      #ids {color:pink}  <!--id selector -->
      .classes {color:purple}  <!- class selector -->
    </style>
  </head>
  <body>
      <li id="ids" class="classes" style="color:blue">html</li>    <!-- style attribute-->
  </body>
</html>


'front-side > CSS' 카테고리의 다른 글

6. 레이아웃 추가(심화)내용  (0) 2021.04.05
5. brackets ~ 레이아웃 기초 내용  (0) 2021.04.02
3. 선택자 fin ~ 타이포그래피  (0) 2021.03.30
2. 선택자  (0) 2021.03.29
CSS Tutorial:  (1) 2021.03.24

#1. 가상 클래스 선택자(pseudo class selector)

: class 선택자처럼 여러 대상에 속성을 지정할 수 있지만, class 선택자는 아닌 것을 의미

=> id나 class 또는 태그 지정:pseudo class selector {디자인 속성 지정}

ex) #fancy:hover{background-color:blue}

: id가 fancy인 요소에 마우스가 올려져 있을 때(=hover)->가상클래스선택자 해당 서식을 적용한다는 의미


가상 클래스 선택자에도 여러 종류가 있는데, 그 중 간단하게 몇 가지만 알아보았다.

1) active

: 해당 요소를 클릭하고 있을 때를 의미.

2) visited

: 주로 <a> 태그와 함께 사용. 이미 클릭한 링크에 적용됨

3) link

: visited 와 반대 경우에 사용. 클릭하지 않은 <a> 링크에 적용됨

4) hover

: 해당 부분에 마우스 커서를 올리고 있을 때 디자인 서식이 적용됨


+) 그 외, 지난 시간에 배운 부분도 pseudo class selector로 사용될 수 있음

ex) p i:first-child   => <p> 태그 안의 <i> 태그 중 first-child 인 요소에만 디자인 적용


<!DOCTYPE html>
<html>
  <head>
    <meta charset="utf-8">
    <title>beta file</title>
    <style>
      #one:hover {background-color:IndianRed}
      #two:hover{background-color:lightSalmon}
      #three:hover{background-color:gold}
      #four:hover{background-color:greenyellow}
      #five:hover{background-color:lightskyblue }
      
      a.stylish:visited{color:green}
      strong.stylish:hover{background-color:lavender}
      a.ping:active{background-color:lightsteelblue ; color:black}
    </style>
  </head>
  <body>
      <p>his article is about the mathematical study of optimizing agents. For the mathematical study of sequential games, see <strong class="stylish">Combinatorial game theory</strong>. For the study of playing games for entertainment, see Game studies. For the YouTube series, see <strong>MatPat</strong>. For other uses, see <strong class="stylish">Game theory</strong> (disambiguation).</p>
      <a href="naver.com"Complex systems organizational map.jpg></a>
      <a href="daum.com"Complex systems></a>
    <ol>
    <li id="one">  Topics </li>
    <li id="two">  Self-organization </li>
    <li id="three">  Collective behaviour </li>
    <li id="four">  Networks </li>
    <li id="five">  Evolution and adaptation </li>
    <li class="stylish">  Pattern formation </li>
    <li class="stylish">  Systems theory </li>
    <li class="stylish">  Nonlinear dynamics </li>
    <li class="stylish">  Game theory </li>
  </ol>

    <h3>Reference Sites</h3><ul>
    <li><a href="https://opentutorials.org/course/1" class="stylish">  Part of a series on </li></a>
    <li><a href="https://youtube.com" class="stylish">  Economics </li></a>
    <li><a href="https://naver.com" class="ping">  IndexOutlineCategory </li></a>
    <li><a href="https://daum.net" class="ping">  HistoryBranchesClassification </li></a>
    <li><a href="https://portal.korea.ac.kr" class="ping">  ConceptsTheoryTechniques </li></a>
    <li><a href="https://blog.naver.com" class="ping">  By application </li></a>
    <li><a href="https://webtoon.naver.com" class="ping">  Notable economists </li></a>
    <li><a href="https://mail.naver.com" class="ping">  Lists </li></a>
    <li><a href="https://google.co.kr" class="ping">  Glossary </li></a>
    <li><a href="https://en.wikipedia.org/wiki/Game_theory" class="stylish">  Emblem-money.svg Business portal </li></a>
    <li><a href="https://tistory.com" class="stylish">  Bills and coins.svg Money portal </li></a></ul>

<br><br>
    <article> <p>Game theory is the study of mathematical models of strategic interaction among rational decision-makers.[1] It has applications in all fields of social science, as well as in logic, systems science and computer science. Originally, it addressed zero-sum games, in which each participant's gains or losses are exactly balanced by those of the other participants. In the 21st century, game theory applies to a wide range of behavioral relations, and is now an umbrella term for the science of logical decision making in humans, animals, and computers.</p>
      <p>Modern game theory began with the idea of mixed-strategy equilibria in two-person zero-sum games and its proof by John von Neumann. Von Neumann's original proof used the Brouwer fixed-point theorem on continuous mappings into compact convex sets, which became a standard method in game theory and mathematical economics. His paper was followed by the 1944 book Theory of Games and Economic Behavior, co-written with Oskar Morgenstern, which considered cooperative games of several players. The second edition of this book provided an axiomatic theory of expected utility, which allowed mathematical statisticians and economists to treat decision-making under uncertainty.</p>
      <p>Game theory was developed extensively in the 1950s by many scholars. It was explicitly applied to evolution in the 1970s, although similar developments go back at least as far as the 1930s. Game theory has been widely recognized as an important tool in many fields. As of 2014, with the Nobel Memorial Prize in Economic Sciences going to game theorist Jean Tirole, eleven game theorists have won the economics Nobel Prize. John Maynard Smith was awarded the Crafoord Prize for his application of evolutionary game theory.</p></article>
  </body>
</html>


Q. #one, #two, ... 이렇게 id를 지정하는데 번거로운 부분이 있었다. id 선택자도 <ol> 태그처럼 순서대로 지정할 수 있는 방법이 있을까?


#1-2. 속성을 공부하는 방법

: 속성(property)을 많이 사용하는 순서대로 통계를 보면, 많이 사용되는 속성은 크게 타이포그래피, 색상, 박스 타입 으로 정리된다. 많이 사용되는 것 위주로 공부해 보자.


#2. 타이포그래피

: 웹페이지에 쓰이는 글씨에 대한 디자인 서식을 의미


1. font-size

여러 단위가 있다(px, em, rem). 지금은 rem 을 권장한다. 이유는?

1) px : 글자 크기 고정. 브라우저의 설정을 변경해도 글씨 크기가 고정됨

2) rem : 글자 크기 가변적. 브라우저의 설정을 변경하면 그에 따라 크기가 변함

ex) rem 은 웹페이지의 [검사(inspect)]를 눌렀을 때 <html>의 폰트 크기와 비례해서 크기가 변한다. 그러나 px는 이에 상관없이 고정된다.

<html>
  <head>
    <meta charset="utf-8">
    <title>beta file</title>
    <style>
      .px{
        font-size:32px ; color:limegreen
      }
      .rem{
        font-size:2rem ; color:orchid
      }
    </style>
  </head>
  <body>
    <article> <p><div class="px">Game theory is the study of mathematical models of strategic interaction among rational decision-makers.[1]</div> <br><div class="px">It has applications in all fields of social science, as well as in logic, systems science and computer science.</div><br> <div class="rem">Originally, it addressed zero-sum games, in which each participant's gains or losses are exactly balanced by those of the other participants.</div><br><div class="rem"> In the 21st century, game theory applies to a wide range of behavioral relations, and is now an umbrella term for the science of logical decision making in humans, animals, and computers.</div></p>
      <p>Modern game theory began with the idea of mixed-strategy equilibria in two-person zero-sum games and its proof by John von Neumann. Von Neumann's original proof used the Brouwer fixed-point theorem on continuous mappings into compact convex sets, which became a standard method in game theory and mathematical economics. His paper was followed by the 1944 book Theory of Games and Economic Behavior, co-written with Oskar Morgenstern, which considered cooperative games of several players. The second edition of this book provided an axiomatic theory of expected utility, which allowed mathematical statisticians and economists to treat decision-making under uncertainty.</p>
      <p>Game theory was developed extensively in the 1950s by many scholars. It was explicitly applied to evolution in the 1970s, although similar developments go back at least as far as the 1930s. Game theory has been widely recognized as an important tool in many fields. As of 2014, with the Nobel Memorial Prize in Economic Sciences going to game theorist Jean Tirole, eleven game theorists have won the economics Nobel Prize. John Maynard Smith was awarded the Crafoord Prize for his application of evolutionary game theory.</p></article>
  </body>
</html>

2. font-color

색깔을 지정하는 방법은 세 가지가 있다.

1) 색깔 이름으로 지정

ex) #ping { color : lightgray }

2) HEX 값으로 지정

ex) h1 { color : #ffffff }

3) RGB 값으로 지정

ex) .dobby { color : rgb(60,60,60) }


+) 색깔을 투명하게 지정할 수 있다.

(opacity 라고 표현하기도 함. 0~1의 값. 0 : 투명 <-> 1 : 불투명)

1) 색깔 이름으로 지정  -> 없음(이미 같은 색깔의 다양한 투명도 버전인 색깔들이 많아서 그런 듯)

2) HEX 값으로 지정  -> #RRAAGGBB 형태의 값. (A: alpha(투명도), R : red, G : green, B : blue) 투명도 없는 색상은 AA를 제외한 6자리를 입력하지만, 투명도를 추가하려면 앞에 두 글자를 추가해주면 된다.

ex) #highlight { color : #ff4D6347 }   => 4D 가 투명도를 의미, ff6347 은 색깔을 의미. 

(-> gist.github.com/lopspower/03fb1cc0ac9f32ef38f4 각 투명도에 따라 어떤 글자를 추가하면 되는지 알려줌)

3) RGB 값일 때 지정

ex) .dobby { color : rgb(50,60,30,0.5) }  => 50% 투명한 색깔이 나타남


3. text-align

텍스트를 어떻게 정렬할지를 지정. 총 4가지 방법이 있다.

1) 왼쪽 정렬  : text-align:left

2) 가운데 정렬  : text-align:center

3) 오른쪽 정렬  : text-align:right

4) 좌우 간격 동일하게 정렬  : text-align:justify (border 보이게 하면 좌측 우측의 공백이 동일하게 나옴)

<!DOCTYPE html>
<html>
  <head>
    <meta charset="utf-8">
    <title>Lorem Ipsum</title>
    <style>
      h2 { color:limegreen ; font-size : 2rem ; text-align:center }
      #left{text-align:left ; border:1px solid lightgreen}
      #center{text-align:center ; background-color:lavenderblush}
      #right{text-align:right ; color:blue}
    </style>
  </head>
  <body>
      <h2>Consierei</h2>
      <p id="left">Lorem ipsum dolor sit amet, consectetur adipiscing elit. Curabitur malesuada id nulla vitae consectetur. Quisque pharetra massa vitae enim lobortis, in finibus nibh finibus. Nam laoreet id est quis scelerisque. Etiam fringilla ullamcorper lectus eu scelerisque. In rhoncus convallis posuere. Curabitur sagittis accumsan tellus et interdum. Praesent molestie eros elit, nec rutrum dolor pharetra non. Nulla purus lacus, ultrices sit amet venenatis non, tempor vel enim. Ut fringilla elementum orci, quis auctor tellus ultrices ut. Praesent ut dui sodales, feugiat leo hendrerit, lobortis elit. Donec erat neque, maximus non hendrerit sit amet, scelerisque sagittis arcu. Maecenas sodales in arcu sed lacinia. Maecenas molestie dui ut elit sodales, nec lobortis justo tristique. Nullam pulvinar sapien vitae magna pretium, nec consectetur odio hendrerit.</p>

      <p id="center">Suspendisse vitae nibh pretium, dictum odio vel, laoreet neque. In hac habitasse platea dictumst. Aliquam rhoncus turpis arcu, sed rhoncus eros posuere vel. Integer fermentum vel augue quis auctor. Nunc tellus ante, posuere sodales dignissim vel, bibendum vel libero. Pellentesque imperdiet pellentesque congue. Vivamus ac euismod velit, sodales fringilla risus. Curabitur nunc odio, finibus non dapibus aliquam, molestie et ligula.</p>

      <p id="right">Phasellus eget nulla tellus. Integer eget justo vitae nibh tempor porttitor. Morbi viverra lorem in tellus aliquet, vitae scelerisque tellus luctus. Praesent orci tortor, vestibulum id molestie at, blandit eu nisi. Fusce aliquam orci tellus, in congue sem tempor vitae. Vivamus eget tortor venenatis, venenatis eros nec, dignissim sem. Vestibulum porta tellus orci, sed pharetra ipsum placerat a. Curabitur in justo ex. Nunc commodo, ante quis mattis fermentum, nibh ante dictum orci, at pulvinar eros orci ac massa.</p>

      <p>In ullamcorper lectus in nunc eleifend, vitae laoreet neque dapibus. Sed non leo ut est dapibus tincidunt. Nam vel metus aliquam metus posuere vestibulum et eget ex. Ut tincidunt vulputate risus, id posuere massa faucibus non. Aenean mollis urna non urna volutpat, ut lobortis risus posuere. Sed elementum porta sapien, non pharetra arcu porta sit amet. Sed ultricies nisl accumsan sapien ornare auctor. Nulla commodo tincidunt urna.</p>

      <p>Praesent nec accumsan urna, a cursus urna. Fusce orci felis, maximus ac urna a, vulputate volutpat nulla. Nulla aliquam sem id nisi molestie, vel maximus leo viverra. Mauris id convallis odio, ultrices molestie sem. Aenean sit amet ultricies felis. Vivamus et pharetra turpis, in efficitur metus. Mauris elit diam, mollis ut iaculis sed, lobortis non orci. Vestibulum tempus cursus egestas. Nunc pretium molestie ex. Praesent justo mauris, pharetra sit amet ipsum rhoncus, molestie tempus arcu.</p>
  </body>
</html>


+) 웹 프로그래밍 경우, 연습용 텍스트가 많이 필요한 경우가 종종 있다.

이럴 때 사용하면 좋은 사이트: www.lipsum.com/


Lorem Ipsum - All the facts - Lipsum generator

What is Lorem Ipsum? Lorem Ipsum is simply dummy text of the printing and typesetting industry. Lorem Ipsum has been the industry's standard dummy text ever since the 1500s, when an unknown printer took a galley of type and scrambled it to make a type spec

www.lipsum.com

의미 없는 텍스트를 대량으로 만들어주는 사이트라 유용하다.

'front-side > CSS' 카테고리의 다른 글

6. 레이아웃 추가(심화)내용  (0) 2021.04.05
5. brackets ~ 레이아웃 기초 내용  (0) 2021.04.02
4. 타이포그래피-font ~ 조화  (0) 2021.04.01
2. 선택자  (0) 2021.03.29
CSS Tutorial:  (1) 2021.03.24

#1. 선택자 공부 팁

선택자의 종류도 많고, 포함관계 등을 따지면 더 복잡하다. 

#1-1. 선택자 공부/연습할 수 있는 사이트 : https://flukeout.github.io


CSS Diner

A fun game to help you learn and practice CSS selectors.

flukeout.github.io

: 테이블 안의 음식 중 특정한 것을 고르는 게임? 퀘스트?인데, 그 과정에서 CSS 선택자의 종류와 여러 관계를 학습할 수 있다.


1. Sibling Selector

1) Adjacent Sibling Selector

A + B

: A와 B가 동일한 level이고(<ul>과 <ol>처럼) A 태그 바로 다음에 B 태그가 언급될 때, B는 A의 adjacent sibling selector이다.

-A 바로 다음에 B가 올 때만 해당

-A 바로 다음에 오는 선택자 하나만 해당


2) General Sibling Selector

A ~ B

: A와 B가 동일한 level이고 A 태그 다음에 B 태그가 언급될 때, B는 A의 general sibling selector이다.

-A 바로 다음이 아니어도 A 뒤에 있는 선택자면 모두 해당

-선택자 여러 개 해당


2. Parent-Child

1-1) Descendant Selector

A  B

: A 선택자 안에 포함된 모든 B 선택자를 선택

-A 선택자 바로 안에 포함된 선택자(direct child)가 아니어도 적용됨


1-2) Child Selector

A>B

: A 선택자 바로 안에 포함된 B선택자만 선택

-B 선택자가 A 선택자의 direct child 일 때만 적용됨


2) First Child Pseudo Selector

(first-child : 부모 선택자에서 첫 번째로 작성된 자식 선택자를 의미)

:first-child  : 모든 부모 선택자에서 first-child element 선택

A:first-child  : A라는 선택자 안에 포함된 first-child element 선택

A  B:first-child  : A 선택자 안에 포함된 B 선택자 안에 포함된 first-child element 선택

+) A>B:first-child  : A 선택자의 direct child인 B 선택자 안에 포함된 first-child element 선택


3) Only Child Pseudo Selector

(only-child : 부모 선택자가 단 하나의 자식 선택자를 가질 때 그 자식을 only child라고 함)

:only-child : 모든 부모 선택자에서 only-child element 선택

A:only-child : A라는 선택자 안에 포함된 only-child element 선택

A  B:only-child : A 선택자 안에 포함된 B 선택자 안에 포함된 only-child element 선택

+) A>B:only-child : A 선택자의 direct child인 B 선택자 안에 포함된 only-child element 선택


4) Last Child Pseudo Selector

(last-child : 부모 선택자에서 마지막으로 작성된 자식 선택자를 의미)
:last-child : 모든 부모 선택자에서 last-child element 선택

A:last-child : A라는 선택자 안에 포함된 last-child element 선택

A  B:last-child : A 선택자 안에 포함된 B 선택자 안에 포함된 last-child element 선택

+) A>B:last-child  : A 선택자의 direct child인 B 선택자 안에 포함된 last-child element 선택


* first-child , only-child , last-child 는 서로 배타적인 관계가 아니다!

= first-child 이면서 only-child 이면서 last-child 일 수도 있다.

ex) 부모 선택자가 하나의 자식 선택자만 가질 때.


+ 선택자가 너무 복잡해서 first-child , only-child , last-child 만으로 표현할 수 없을 때 사용하는 선택자:

5) Nth Child Pseudo-Selector

(nth-child : 부모 선택자에서 n번째로 작성된 자식 선택자를 의미)

:nth-child(a)  : 모든 부모 선택자를 대상으로 a번째 자식 선택자를 선택

A:nth-child(a)  : A라는 부모 선택자를 대상으로 a번째 자식 선택자를 선택

+) A  B 나 A>B 등의 부모-자식 관계를 앞에 적용하는 것도 물론 가능

- 앞에서부터 세는 방식


6) Nth Last Child Selector

(nth-last-child : 부모 선택자에서 뒤에서부터 셌을 때 n번째에 있는 자식선택자를 의미)
:nth-last-child(a)  : 모든 부모 선택자를 대상으로 끝에서 a번째 있는 자식 선택자를 의미

+) A  B 나 A>B 등의 부모-자식 관계를 앞에 적용하는 것도 물론 가능

- 뒤에서부터 세는 방식


3. Type

type : 어떤 태그나 선택자의 종류를 지정할 때 사용

* Type 역시 first, only, last, nth 등으로 종류를 지정한다.


1) First of Type Selector

:first-of-type  : 선택자의 종류 상관없이, 같은 선택자 중에서 첫 번째로 제시된 선택자를 의미

A:first-of-type  : A라는 선택자 중에서 첫 번째로 제시된 선택자를 의미

+ 부모-자식관계 적용 가능


2) Only of Type Selector

:only-of-type : 같은 선택자인 요소가 없는 경우. 자신만이 해당 선택자일 경우 그 element를 의미

A:only-of-type : A라는 선택자 종류인 유일한 element를 의미

+ 부모-자식관계 적용 가능


3) Last of Type Selector

:last-of-type : 선택자의 종류 상관없이, 같은 선택자 중에서 마지막으로 제시된 선택자를 의미

A:last-of-type : A라는 선택자 중에서 마지막으로 제시된 선택자를 의미

+ 부모-자식관계 적용 가능


4) Nth of Type Selector

:nth-of-type(a) : 선택자의 종류 상관없이, 같은 선택자 중에서 a번째로 제시된 선택자를 의미

A:nth-of-type(a) : A라는 선택자 중에서 a번째로 제시된 선택자를 의미

A:nth-of-type(odd) : A라는 선택자 중에서 홀수 번째로 제시된 선택자를 의미

+ 부모-자식관계 적용 가능


4-1) Nth of Type Selector with Formula

A:nth-of-type(an+b) : A라는 선택자 중에서 b번째부터 시작해서, 매 a번째 element를 의미

ex) li:nth-of-type(3n+2) : <li> 태그 선택자 중에서 2번째부터 시작해서, 매 3번째 element를 의미

(= 2,5,8,11, ... 번째의 li 태그 선택자를 의미)

* nth type selector로도 지칭할 수 없는 선택자가 있을 때 사용하는 것 같다.


#1-2. CSS cheat sheet : CSS 공부 중 모르는 점을 찾아볼 수 있는 정리표 개념

구글 이미지검색에 'CSS cheat sheet selector' 라고 검색하면 잘 정리된 표를 찾아볼 수 있다.


'front-side > CSS' 카테고리의 다른 글

6. 레이아웃 추가(심화)내용  (0) 2021.04.05
5. brackets ~ 레이아웃 기초 내용  (0) 2021.04.02
4. 타이포그래피-font ~ 조화  (0) 2021.04.01
3. 선택자 fin ~ 타이포그래피  (0) 2021.03.30
CSS Tutorial:  (1) 2021.03.24

0. CSS 소개

HTML과 CSS의 관계에 대해 배우던 중 이런 글을 보았다:


  • Inline - by using the style attribute inside HTML elements
  • Internal - by using a <style> element in the <head> section
  • External - by using a <link> element to link to an external CSS file

CSS가 HTML 문서에 적용될 수 있는 3가지 방법에 대한 글이다.

1) Inline 방법은 개별 HTML 요소에 style '속성'을 지정하는 방법,

2) Internal 방법은 <style> 태그를 사용하는 방법으로, {}을 사용해서 <p>, <h1> 등 '태그'별로 스타일을 할당할 수 있다.

3) External 방법은 <link> 태그로 외부 파일을 끌어오는 방법인데, CSS 언어를 알아야만 사용가능한 방법이다.

: 실제로 화려한 웹사이트를 보면 대부분 이 방법을 사용해서 적용할 수 없었던 게 아쉬웠다. 이번에 CSS를 배우면서 적용해 보려고 한다!


* ctrl + O 키를 누르면 사용중인 브라우저에서 내 컴퓨터의 파일을 불러올 수 있다.


1. HTML과 CSS를 연결하는 방법 : style

style : HTML의 태그/속성이고 이제부터 CSS 문법이 사용된다는 것을 알려준다.

1) style 속성

: HTML의 문법에서 style 이라는 '속성'이 있다.

이때 안쪽의 color:skyblue  부분은 CSS 문법이고, 나머지는 HTML 문법이다.

    <h2 style="color:skyblue">Dobby is free!</h2>
    <h2 style="color:skyblue">Dobby is free!</h2>
    <h2 style="color:skyblue">Dobby is free!</h2>

2) style 태그

: HTML의 태그 중 style 태그가 있다. 

이 태그에 둘러싸인 부분에서 CSS 문법이 사용된다는 것을 알려주는 역할을 한다.

장점1: 1) 과 똑같은 결과물이 나오지만, <style> 태그는 특정 태그가 반복될 때 태그별로 다른 서식을 적용시킬 수 있다. 태그가 많을 때 효율적이다.

장점2: <style> 태그는 <head> 태그 안에서 본문의 부연설명으로 쓰인다. 코드상 디자인과 정보 기능을 더 잘 분리시켜서 보여줄 수 있다.

<html>
  <head>
    <style>
      h2 {color:skyblue}
    </style>
  </head>
  <body>
    <h2>Dobby is free!</h2>
    <h2>Dobby is free!</h2>
    <h2>Dobby is free!</h2>
  </body>
</html>


2. CSS의 문법 (1) : Selector(선택자) 와 Declaration(선언)

ex) 

    <style>
      h2 {
          color:skyblue;
          text-decoration:underline
          }
    </style>

h2 는 Selector(선택자)이고 디자인 설정을 받을 개체이다.

{  } 안의 부분은 Declaration(선언)이고 Selector에 적용될 디자인 설정이다.

color , text-decoration 부분은 property(속성)이며 Declaration 안의 구체적인 요소들을 의미한다.

skyblue , underline  부분은 value(속성값)이며 property에 할당되는 값이다.

: 은 property와 value를 구분한다.

; 은 각각의 declaration을 구분한다. (declaration이 하나이면 안 써도 된다)


그런데 태그 단위로 선언을 하고 싶지 않을 수도 있다.

ex) 여러 <li> 태그 중 하나만 다른 색으로 표시하고 싶을 때

=> 다른 종류의 Selector를 사용하면 된다.


사실 Selector에는 세 종류가 있다.

  • Tag Selector : 태그 단위로 선언할 때
  • ID Selector
  • Class Selector

1) ID Selector

: <style> 태그 안에서 ID를 정의한 뒤 따로 다른 선언을 하고 싶은 개체에 해당 ID를 입력하면 된다.

    <style>
      #ping {
        color:#228B22 ; font-size: 30px
      }

    </style>

    <h2 id="ping">Dobby is free!</h2>


 # 뒤에는 ID 개체의 이름을 원하는 대로 정해서 입력하고, {  } 안에 디자인 요소를 지정해 준다.

-> 해당 ID Selector를 사용하고 싶으면 해당 개체 속성에 id="Selector 이름"  이런 식으로 지정한다. 

<html>
  <head>
    <style>
      #ping {
        color:#228B22 ; font-size: 30px
      }
      #dobby {
        background-color:LemonChiffon ; font-weight:bold
      }
    </style>
  </head>
  <body>
    <h1 id="ping">CSS</h1>
    <h1>CSS</h1>
      <h2>Dobby is free!</h2>
      <h2 id="dobby">Dobby is free!</h2>
  </body>
</html>


2) Class Selector

: <style> 태그 안에서 Class를 정의한 뒤 따로 다른 선언을 하고 싶은 개체에 해당 Class를 입력하면 된다.


ID Selector 와의 차이점이 무엇인가?

적용 방법은 거의 비슷하다. 다만 의미에 차이가 있다.

-Class : 여러 학생들을 구분할 때 '반'의 개념. 여러 개체를 '그룹화', '묶어서' 구분할 때 사용

-ID : 학생들 하나하나가 갖는 '고유한' 번호. 고유한 하나의 개체가 하나의 ID를 가짐.

=> Class Selector는 여러 번 사용 가능, ID Selector는 한 번만 사용 가능.


또한 class selector는 .dobby  이렇게 class 선언하기 전 . 을 찍는다.

<-> id selector는 #을 붙인다.

<html>
  <head>
    <style>
      #pping {
        color:#228B22 ; font-size: 30px
      }
      .dobby {
        background-color:LemonChiffon ; font-weight:bold
      }
    </style>
  </head>
  <body>
    <h1 id="pping">CSS</h1>
    <h1>CSS</h1>
      <h2>Dobby is free!</h2>
      <h2 class="dobby">Dobby is free!</h2>
      <h2>Dobby is free!</h2>
      <h2 class= "dobby">Dobby is free!</h2>
      <h2>Dobby is free!</h2>
      <h2 class= "dobby">Dobby is free!</h2>
        <h3>welcome</h3>
        <h3>welcome</h3>
  </body>
</html>

+) CSS에는 다양한 종류의 색깔이 있다.

Colors Tutorial (w3schools.com) 여기서 색깔 이름을 볼 수 있다.


3. CSS의 문법 (2) : 부모-자식 선택자

ex) <ol>, <ul>, <li> 태그의 경우, <ol>과 <ul> 태그는 <li> 태그를 포함한다.

즉 태그간의 포함관계가 있을 때, 특정 부분의 스타일을 지정하려면 부모-자식 관계를 고려해야 한다.

부모-자식 관계를 고려해서 Style 지정할 수 있는 여러 가지 경우:


경우1) 특정 태그 안에 포함되는 다른 태그의 디자인 지정할 때

<html>
  <head>
    <style>
      ol li {
        border-style : solid ; border-color : Salmon ;
        border-radius : 6px ; border-width: 1px
      }
    </style>
  </head>
  <body>
    <ol>
      <li>Window</li>
      <li>Mac OS</li>
      <li>Linux</li>
    </ol>
    <ul>
      <li>iPad</li>
        <ol>
          <li>iPad Air
            <ol>
              <li>iPad Air 3</li>
              <li>iPad Air 4</li>
            </ol>
          </li>
          <li>iPad Pro</li>
        </ol>
      <li>Galaxy Tabs</li>
      <li>Others</li>
    </ul>
  </body>
</html>

=> ol 태그 안에 포함된 li 태그의 경우라면 모두 해당 border 서식이 적용되었다.


경우2) 특정 태그의 바로 안에 포함되는 태그한테만 디자인 적용할 때

(아까는 A태그 안에 포함된 B태그라면 무조건 위의 디자인을 적용하는 경우였고, 

지금은 A태그 바로 안에 B태그가 포함된 경우에만 위의 디자인 서식을 적용하는 경우이다.)

cf) 아까 : A태그 안에 C태그, 그 안에 B태그 포함되면 => 적용됨

    지금 : A태그 안에 C태그, 그 안에 B태그 포함되면 => 적용 안 됨

** 만약 같은 종류의 태그인데 한쪽 태그에만 디자인을 적용하고 싶다면, id나 class Selector로 구분시켜 준다.

    <style>
      #tablet li {
        border-style : solid ; border-color : Salmon ;
        border-radius : 6px ; border-width: 1px
      }
    </style>

=> iPad Air 바로 아래의 <ol> 태그에만 id="tablet" 으로 ID Selector를 입력하였고, 이에 따라 해당 <ol> 태그 안에 속한 <li> 태그의 내용에만 디자인 서식이 적용되었다.


경우3) 여러 개의 태그에 같은 서식을 적용할 때

* 여러 태그가 포함관계에 있지 않아도 적용된다.

* A태그가 B태그를 포함하고 있는데 A태그에 서식이 적용되면 당연히 B태그에도 서식이 적용된다.

    <style>
       ul, ol {
        border-style : solid ; border-color : ForestGreen ;
        border-radius : 6px ; border-width: 3px
      }
    </style>

=> <ul> 태그와 <ol> 태그 모두 서식이 적용되었고, 둘 다 <li> 태그를 포함하고 있으므로 그 안의 <li>태그에도 개별적으로 서식이 적용되었다.

지금까지 상위 태그에만 적용한 속성이 하위 태그에도 적용된 것은 "상속" 이라는 개념 때문이다.


상속(Inheritance)

: 상위 태그(부모 태그) 에서 적용된 속성은 별다른 지시 없이도 하위 태그(자식 태그)에도 그대로 적용된다.


'front-side > CSS' 카테고리의 다른 글

6. 레이아웃 추가(심화)내용  (0) 2021.04.05
5. brackets ~ 레이아웃 기초 내용  (0) 2021.04.02
4. 타이포그래피-font ~ 조화  (0) 2021.04.01
3. 선택자 fin ~ 타이포그래피  (0) 2021.03.30
2. 선택자  (0) 2021.03.29

# 참고한 페이지

1. opentutorials.org/module/552


HTML5 태그 사전

표지가 허전해서 임시로 올려봤어요.. ^^ 자매품 CSS Dictionary도 있습니다.

opentutorials.org

2. www.w3schools.com/tags/default.asp


HTML Reference

w3schools.com --> THE WORLD'S LARGEST WEB DEVELOPER SITE

www.w3schools.com


#0. <abbr> 태그

: 텍스트를 생략어로 지정해주는 태그.

- title 속성을 가진다. <abbr title="풀 네임"> 줄임말 </abbr>  => 주로 이런 식으로 사용한다.

<!DOCTYPE html>
<html lang="en" dir="ltr">
  <head>
    <meta charset="utf-8">
    <title></title>
  </head>
  <body>
    <abbr title="acquired immune deficiency syndrome">AIDS</abbr>
    <abbr title="laughing out loud">LOL</abbr>
    <abbr title="too much information">TMI</abbr>
  </body>
</html>

=> 결과물로 텍스트 3개가 나오는데, 각 단어에 커서를 갖다 대면 단어의 풀 네임이 부가설명으로 나온다.


1. <address> 태그

: 연락처 정보를 나타내는 태그

<address>
Written by <a href="C:\Users\USER\Desktop\WEB\txt\webpagemaking_1.txt">Lullulu</a>.<br>
Visit us at:<br>
txtborder.com<br>
Sanbon 757, Aricafe<br>
KOREA
</address>

연락처 형식으로 결과물이 나온다. <address> 태그 안의 내용들은 기본값으로 기울임체가 적용된다.


#2. <area> 태그

: 이미지의 구체적인 영역을 지정해주는 태그

ex. 하나의 이미지에서 특정 구역을 클릭하면 hyperlink A, 다른 구역을 클릭하면 hyperlink B 이런 식으로 다르게 이동.

area 태그는 map, img 태그와 거의 같이 쓰인다.

사용방법은:

1) 맨 처음에 <img> 로 이미지를 제시하고, usemap 속성으로 map 이름을 정의한다.

2) <map>에서 <img>와 같은 이름을 제시하고, <map> 안에 <area>가 들어간다.

* 한 이미지에서 나누고 싶은 영역 수 만큼 <area> 사용하면 된다.

ex) 한 이미지를 세 구역으로 나누고 싶다 => <area> 태그 3번 사용하면 됨


속성:

-shape : 구역의 모양

=> default(사진 전체) / rect(직사각형) / circle(원) / poly(다각형) 이 있음.

-coords : 좌표. 정확히 어느 구역인지를 설명함. 지정한 shape 에 따라 다른 좌표 사용함.

=> rect : (왼쪽 위 점의 X좌표, Y좌표, 오른쪽 아래 점의 X좌표, Y좌표) , 

     circle : (원의 중심 좌표, 반지름) , poly(첫 번째 각의 X좌표, Y좌표, 두 번째 각의 X좌표, Y좌표, 세 번째 각의 X좌표, Y좌표)

-alt : 이미지가 나타나지 않았을 때 부연 설명할 메시지

-href : 해당 영역을 누르면 이동할 url 등의 주소

-target : 새 링크로 이동 시 창이 어디에 열릴지를 설정함.

(늘 _parent 옵션과 _top 옵션이 헷갈렸었는데, 블로그 글 보고 정리했다.)

     - "_parent" : 부모 창에서 열림. 만약 창 A에서 창 B가 열리면, A는 B의 부모 창이다. 그러므로 창 B에서 target을 parent로 설정할 경         우, 창 A에서 새 링크가 열린다.

     - "_top" : 비슷한 개념으로, '최고 부모 창'에서 링크가 열린다. 만약 A에서 B, B에서 C가 나왔고 창 C에서 target을 top으로 설정한다         면, 부모 창 B가 아니라 C의 기준 최고 부모 창인 A에서 새 링크가 열린다. 

     - "_blank" : 새 창에서 링크가 열린다(이때 기존 창은 새 창의 부모 창이 된다).

     - "_self" : 해당 창에서 링크가 열린다.


사용예시:

<!DOCTYPE html>
<html lang="en" dir="ltr">
  <head>
    <meta charset="utf-8">
    <title>web review</title>
  </head>
  <body>
    <abbr title="JohnMat">JMT</abbr> <br>
    <abbr title="RapMonster">RM</abbr>

    <img src="C:\Users\USER\Desktop\WEB\image\france.jpg"  alt="France" usemap="#france" width="600" height="400">

    <map name="france">
      <area shape="rect" coords="0,400,200,0" alt="Blue" href="https://en.wikipedia.org/wiki/Blue">
      <area shape="rect" coords="200,400,400,0" alt="White" href="https://en.wikipedia.org/wiki/White">
      <area shape="rect" coords="400,400,600,0" alt="Red" href="https://en.wikipedia.org/wiki/Red">
    </map>
  </body>
</html>

더 자세한 정보는 www.w3schools.com/tags/tag_area.asp 에 나와 있는데 너무 많아서 정리를 못 했다.


#3. <article> 태그

: <p> 가 단락을 구분하는 태그라면, <article>은 문서 내 독립적인 컨텐츠를 나타낸다. 

사용예시: 

<!DOCTYPE html>
<html lang="en" dir="ltr">
  <head>
    <meta charset="utf-8">
    <title>web review</title>
  </head>
  <body>

    <article>
      <h2>Machine Learning</h2>
      Machine learning (ML) is the study of computer algorithms that improve automatically through experience and by the use of data.[1] It is seen as a part of artificial intelligence. Machine learning algorithms build a model based on sample data, known as "training data", in order to make predictions or decisions without being explicitly programmed to do so.[2] Machine learning algorithms are used in a wide variety of applications, such as email filtering and computer vision, where it is difficult or unfeasible to develop conventional algorithms to perform the needed tasks. <br><br> A subset of machine learning is closely related to computational statistics, which focuses on making predictions using computers; but not all machine learning is statistical learning. The study of mathematical optimization delivers methods, theory and application domains to the field of machine learning. Data mining is a related field of study, focusing on exploratory data analysis through unsupervised learning.[4][5] In its application across business problems, machine learning is also referred to as predictive analytics.
    </article>
    <article>
      <h2>Supervised Learning</h2>
      Supervised learning is the machine learning task of learning a function that maps an input to an output based on example input-output pairs.[1] It infers a function from labeled training data consisting of a set of training examples.[2] In supervised learning, each example is a pair consisting of an input object (typically a vector) and a desired output value (also called the supervisory signal). A supervised learning algorithm analyzes the training data and produces an inferred function, which can be used for mapping new examples. An optimal scenario will allow for the algorithm to correctly determine the class labels for unseen instances. This requires the learning algorithm to generalize from the training data to unseen situations in a "reasonable" way (see inductive bias). This statistical quality of an algorithm is measured through the so-called generalization error.[3]
    </article>
    <article>
      <h2>Unsupervised Learning</h2>
    Unsupervised learning (UL) is a type of algorithm that learns patterns from untagged data. The hope is that through mimicry, the machine is forced to build a compact internal representation of its world. In contrast to supervised learning (SL) where data is tagged by a human, e.g. as "car" or "fish" etc, UL exhibits self-organization that captures patterns as neuronal predelections or probability densities.[1] The other levels in the supervision spectrum are reinforcement learning where the machine is given only a numerical performance score as its guidance, and semi-supervised learning where a smaller portion of the data is tagged. Two broad methods in UL are Neural Networks and Probabilistic Methods.
    </article>

  </body>
</html>

코드가 이런 식으로 나오는데, Machine Learning 글 안에 단락은 <p> 태그로 구분되어 있고, 각 학습(Learning)의 종류는 <article>으로 구분되어 있다.

즉 <p> 보다는 더 컨텐츠를 독립적으로 구분시켜 주는 것이 <article> 태그이다.

<p> : 같은 주제 내에서 단락을 바꿀 때

<article> : 다른 주제로 글을 작성할 때  


#4. <aside> 태그

: 중심 컨텐츠와 관련은 있지만 직접적이지 않은 내용을 사이드로 빼서 설명하는 용도의 태그.

* 그런데 aside는 html 문서 상에서는 본문과 차이가 없다.

=> <aside>로 본문과 차이를 주려면, CSS를 사용해서 <style>을 적용해야 한다.

사용예시:

<html>
<head>
<style>
aside {
  width: 30%;
  padding-left: 15px;
  margin-left: 15px;
  float: right;
  font-style: italic;
  background-color: lightgray;
}
</style>
</head>
<body>

<h1>The aside element</h1>

<p>My family and I visited The Epcot center this summer. The weather was nice, and Epcot was amazing! I had a great summer together with my family!</p>

<aside>
<p>The Epcot center is a theme park at Walt Disney World Resort featuring exciting attractions, international pavilions, award-winning fireworks and seasonal special events.</p>
</aside>

<p>My family and I visited The Epcot center this summer. The weather was nice, and Epcot was amazing! I had a great summer together with my family!</p>

</body>
</html>

<style> 태그로 aside 태그에 {}로 속성을 부여했다.

[padding(-left) : (왼쪽)경계와 (왼쪽)글자 사이의 거리 / margin(-left) : (왼쪽) 경계와 다른 컨텐츠 요소 사이의 거리]

그렇다면 정확히 어떻게 <style> 태그로 속성을 부여한다는 것일까?


#5. <style> 태그

: 개체의 글자색, 배경색 등 개체의 스타일 정보를 포함시킨다.

주로 CSS를 통해 사용되지만, html 으로도 간단한 스타일 정보는 포함시킬 수 있다.

아래 예시에서 <style> 안의 요소는 변수가 아니라 '태그'이다.

<html>
  <head>
    <style>
    h1 {color:red;}
    p {color:blue;background: green;}
  </style>
  </head>
<body>

  <h1>A heading</h1>
  <p>A paragraph.</p>

</body>

이런 식으로 h1 태그에는 빨간색 글씨체를, p 태그에는 파랑 글씨체와 초록 배경을 <style>로 부여하였다.

=> h1 이랑 p 태그를 사용할 때마다 해당 서식이 적용되어서 나온다.

지금은 <style>에서 태그 단위로 속성을 부여한 것이고, 다른 형식의 데이터에도 style을 부여할 순 있지만 형식이 복잡하고 보통은 CSS에서 많이 이뤄지는 작업이다.


만약 태그가 중복되면 어떻게 될까?

: A 태그와 B 태그에 다른 스타일을 할당했는데 해당 본문 내용이 A 태그와 B 태그 둘 모두 안에 포함된다면?

<html>
  <head>
      <style>
        p {color:skyblue;background: pink;}
        article {color: white; background : black}
      </style>
  </head>
  <body>
    
    <p>A paragraph.</p>
    <article>
    Oceans are a crucial part of the biosphere, soaking up carbon dioxide, absorbing more than 90 percent of the excess heat trapped on Earth from carbon emissions and producing half of global oxygen. But as we continue to pump greenhouse gases into the atmosphere, the strain is taking its toll. Action is imperative, but how do we unlock and accelerate ocean-oriented solutions without repeating the mistakes of the past? Join us on March 25 for the debate.
    </article>

    <article>
      <p>
        Every weekday, The Morning newsletter helps millions of readers make sense of the day’s news and ideas. Now, for the first time, join David Leonhardt for a special live edition, created just for subscribers.
      </p>
      <p>
        Hear the latest on the rapidly evolving Covid pandemic directly from public health researchers Ashish Jha of Brown University and Jennifer Nuzzo of Johns Hopkins. They’re here to answer your questions about the latest Coronavirus variants, vaccines and research.
      </p>
    </article>

  </body>
</html>

결과: <article> 태그 안에 <p> 태그가 들어간 부분에서는 <p> 태그의 스타일이 우선적으로 적용된다.

=> 태그가 중첩된 경우, 가장 안에 있는 (본문과 가까운) 태그 스타일이 우선적으로 적용된다.


오늘은 지금까지 배운 태그 및 내용들을 정리해보려고 한다.


HTML 문서의 기본 구조

HTML 문서는 최상위 태그인 <html> 태그 안에, 그 다음으로 상위 태그인 <head>와 <body> 태그가 있다.

<head> 태그는 본문에 나타나지는 않지만, 본문의 속성들을 설명해 주는 경우가 많다.

반면 <body> 태그 안에는 본문에 표시되는 내용이 들어간다.


예시로 section.blog.naver.com/BlogHome.nhn?directoryNo=0&currentPage=1&groupId=0

네이버 블로그 메인페이지의 html 소스를 살펴보면, 

<head> 태그 안에는 <meta>, <script>, <link>, <title>, <base> 등 특정 태그가 중점적으로 쓰이는 걸 볼 수 있다.


여기서 지금 알고 있는 건 <title> 태그와 <base> 태그이다.

<meta> 태그도 사용한 적은 있는데, 안에 속성들이 너무 다양해서 다방면으로 사용하는 방법은 모른다.

<!DOCTYPE html>
<html lang="en" dir="ltr">
  <head>
    <meta charset="utf-8">
    <title>web review</title>
  </head>
  <body>
    <p>
      Machine learning (ML) is the study of computer algorithms that improve automatically through experience and by the use of data.[1] It is seen as a part of artificial intelligence. Machine learning algorithms build a model based on sample data, known as "training data", in order to make predictions or decisions without being explicitly programmed to do so.[2] Machine learning algorithms are used in a wide variety of applications, such as email filtering and computer vision, where it is difficult or unfeasible to develop conventional algorithms to perform the needed tasks. <br><br> A subset of machine learning is closely related to computational statistics, which focuses on making predictions using computers; but not all machine learning is statistical learning. The study of mathematical optimization delivers methods, theory and application domains to the field of machine learning. Data mining is a related field of study, focusing on exploratory data analysis through unsupervised learning.[4][5] In its application across business problems, machine learning is also referred to as predictive analytics.
    </p>
  </body>
</html>

궁금증)

<html lang="ko"> 와 <meta charset="utf-8"> 의 차이점은 무엇일까?

1) meta charset="utf-8"

: meta 는 다른 데이터를 설명해 주는 데이터를 의미하고, 즉 이 태그는 다른 데이터를 설명할 때 쓰는 태그이다.

charset 는 character set 의 약자로, 문자가 어떤 방식으로 코딩/입력되는지를 의미한다.

charset 에도 여러 종류가 있다. ex) meta charset = "euc-kr" 로 설정하면 한국어, 영어, 일본어만 입력 가능하다.

그런데 utf-8은 유니코드를 위한 문자셋을 의미해서, 웬만한 다국어를 있는 그대로의 문자로 나타낼 수 있다.

2) html lang = "ko"

: html은 가장 최상위 태그이다. html 태그 안의 lang 속성은 해당 문서에서 어떤 언어를 사용할지를 지정한다.

homzzang.com/b/html-156 우리나라는 "ko", 영어는 "en" 등 나라마다 언어 코드가 있다. (왼쪽 링크에서 볼 수 있음)

+ dir = "ltr" 은 무슨 의미?

dir = direction 의 약자. 글자가 입력되는 방향을 의미.

ltr = left to right 를 의미. 즉 글자가 왼쪽에서 오른쪽으로 입력된다는 의미이다!


그럼 아까의 예시에서 dir = "rtl" (right to left) 로 설정하면 어떻게 될까?

<!DOCTYPE html>
<html lang="en" dir="rtl">
  <head>
    <meta charset="utf-8">
    <title>web review</title>
  </head>
  <body>
    <p>
      Machine learning (ML) is the study of computer algorithms that improve automatically through experience and by the use of data.[1] It is seen as a part of artificial intelligence. Machine learning algorithms build a model based on sample data, known as "training data", in order to make predictions or decisions without being explicitly programmed to do so.[2] Machine learning algorithms are used in a wide variety of applications, such as email filtering and computer vision, where it is difficult or unfeasible to develop conventional algorithms to perform the needed tasks. <br><br> A subset of machine learning is closely related to computational statistics, which focuses on making predictions using computers; but not all machine learning is statistical learning. The study of mathematical optimization delivers methods, theory and application domains to the field of machine learning. Data mining is a related field of study, focusing on exploratory data analysis through unsupervised learning.[4][5] In its application across business problems, machine learning is also referred to as predictive analytics.
    </p>
  </body>
</html>

이처럼 같은 텍스트를 '오른쪽 정렬' 한 방식으로 출력된다.

'front-side > HTML' 카테고리의 다른 글

새로운 태그 공부  (0) 2021.03.23
18. 웹호스팅 ~ 19. 웹서버 운영하기 + HTML 태그 공부  (0) 2021.03.22
웹 페이지 완성 ~ 원시 웹  (0) 2021.03.19

18. 웹호스팅

서버를 운영하려면 많은 조건들이 갖춰져야 한다.

항상 켜져 있는 컴퓨터가 있어야 하고, 밖에서도 그 컴퓨터에 연결될 수 있어야 한다.


즉 web hosting = 서버를 운영하기 위해 컴퓨터를 빌려주는 것!

(실제로 많은 웹 호스팅 업체들이 있다)


하지만 무료로, 웹 서버를 제공해주는 사이트가 있다! 이 사이트에서 직접 웹 서버를 만들어 보자.


1. 깃허브(Github)

repository = 저장하는 공간.

즉 우리가 작성한 코드를 깃허브에 보관해둘 수 있다!

1) 웹호스팅 역할을 어떻게 깃허브가 대신하는가?

서버를 만들 때에는 '서버''클라이언트' 만이 존재했다.

1. 위에서는 깃허브가 서버의 역할을 대신하고, 대신 깃허브가 서버 역할을 할 수 있게 내 컴퓨터에 있던 index.html 이라는 코드를 깃허브에게로 넘겨준 것이다. 

2. 그리고 내 웹사이트를 방문하기를 원하는 사람들에게 도메인 주소를 넘긴다면, 이 방문자들은 깃허브가 서버 역할을 하면서 관리하고 있는 내 웹서버에 방문할 수 있게 된다.


2) 깃허브 말고 다른 사이트는 없나? 추천하는 웹호스팅 검색어 : free static web hosting

+ 추천하는 웹호스팅 서비스


www.bitballoon.com


Netlify App

Loading Netlify dashboard

app.netlify.com

www.neocities.com  

Amazon S3

Google Cloud Storage

Azure Blob

=> 위 서비스들은 무료로 웹호스팅을 해 주거나, 또는 일정 사용량까지는 무료로 쓸 수 있는 웹 호스팅 업체들이다!


19. 웹서버 운영하기

이번에는 직접 내 컴퓨터로 웹서버를 운영하는 방법에 대해서 알아보자!

한 번도 생각해 본 적이 없지만, 웹브라우저는 제품명이 아니라 제품군이라고 한다.

즉 웹브라우저는 제품의 한 종류이고, 웹브라우저의 종류도 여러가지라는 말이다.

대표적으로는 : Apache, IIS, Nginx  등이 있다. (처음 들어본다)


그런데 인터넷은 여러 가지 이유로 중간에 작동하지 않거나 오류가 날 수도 있다.

이를 대비해서 문제를 스스로 찾고 해결해보는 연습이 필요하다!

=> 추천검색어 : how to install apache http server windows


19-1. 윈도우에서 Apache 설치하는 법

1. Apache를 직접 설치하는 대신, Apache를 설치하는 것을 도와주는 프로그램을 설치하는 방법

2. Apache를 직접 설치하는 방법

=> 1번 방법을 사용한다.

+ Apache 설치를 도와주는 프로그램들은 how to easy install apache http server windows 10 을 검색하고, 

apache 웹페이지의 게시물을 보면 알 수 있다.

여기서는 아래 사이트를 추천한다.

나는 Bitnami WAMP Stack 를 이용하기로 했다. 

W : windows, A : apache, M : mysql, P : PHP    이런 의미라고 한다.

그럼 Bitnami를 설치해 준다!


19-2. 웹서버 운영하기와 HTTP

Bitnami WAMP는 어떻게 작동하는가?

WAMP manager 의 Apache에서 초록불이 들어온다면 웹서버가 작동하고 있다는 것이다.

1) WAMP를 열면 우리 컴퓨터에 있는 웹 서버의 메인 페이지가 나온다.

주소로는 http://127.0.0.1/index.html 이라고 나와 있다.


127.0.0.1은 무엇인가?

여기서의 127.0.0.1 을 IP 주소라고 한다. (Internet Protocol Address)

각 페이지마다 고유한 IP 주소가 있고, 127.0.0.1은 해당 웹 서버의 메인 페이지의 IP 주소이다.


그럼 index.html 은 무슨 의미인가?

apache 파일에는 htdocs 라는 폴더가 있고, 여기에 이 컴퓨터의 웹서버 안에 저장된 html 파일들이 모두 저장되어 있다.

= 이 컴퓨터의 웹서버를 사용할 때, htdocs 폴더에 있는 파일은 이 웹서버에서 꺼내서 다른 사용자의 웹 브라우저로 전송해 줄 수 있다.

= 만약 이 컴퓨터의 웹 서버를 사용하는 사람이 해당 웹 서버로 index.html 파일을 요청했다면, 그리고 index.html 파일이 해당 웹 서버가 존재하는 컴퓨터의 htdocs 파일 안에 있다면, 웹 서버는 바로 index.html 파일의 코드(?) 를 신호로 다른 웹 브라우저에게 보내줄 수 있다.


HTTP란 무엇인가?

HTTP는 HyperText Transfer Protocol의 약자로, 웹 브라우저와 웹 서버가 정보를 주고받을 때 필요한 통신 규약이다.

HTTP는 '두 대 이상의 컴퓨터가 웹 서버와 웹 브라우저로써 정보를 주고 받을 때' 반드시 필요하다!

1) 한 컴퓨터에 웹 브라우저와 웹 서버가 모두 있다면 -> HTTP를 사용할 수 있지만 필수적이지는 않다.

2) 다른 컴퓨터와(보통은 웹 서버와) 통신하려면? -> HTTP 주소가 반드시 필요하다.

더보기

Q. 127.0.0.1 은 어떤 주소인가?

A. 내 컴퓨터에 설치된 웹서버에서, 자기 자신에게 접속할 때 사용하는 IP 주소이다.

이 주소는 '예약' 되어서, HTTP와 함께 사용할 수 없다.

또한 컴퓨터에 현재 웹 서버가 실행되고 있지 않으면 주소를 입력해도 페이지가 뜨지 않는다.


Q. HTTP와 HTTPS의 차이는 무엇인가?

A. S(Secure Socket, 보안) 라는 차이점이 있다. 

HTTP : 보안 X. 정보를 단순 텍스트로 주고 받기 때문에, 중간에 신호가 인터셉트된다면 정보가 유출될 수 있다.

HTTPS : 보안 O. 주고받는 정보는 두 개의 키(암호화 키, 복호화 키)로 암호화되어 있으므로, 중간에 정보를 유출하더라도 키가 있어야만 정보를 볼 수 있다.

+ 이때 두 개의 키 A, B는 각각 서로를 암호화/복호화할 수 있다

(= A로 암호화한 정보는 B로 복호화, B로 암호화한 정보는 A로 복호화할 수 있다)

+ 만약 A를 공개키, B를 비밀키라고 한다면(반대 경우도 가능하다), 정보를 이렇게 주고받는다:

(공개키 : 공개키 저장소에 보관되어 누구나 알 수 있는 키, 비밀키 : 개인에게만 주어진 키)

(1) 사용자가 서버에 정보를 전송하는 경우 : 

1) 사용자의 웹 브라우저가 공개키 A를 갖고, 웹 서버가 비밀키 B를 갖는다.

2) 웹 브라우저에서 보낼 정보를 공개키 A로 암호화해서 웹 서버에게 전송한다.

이때, 중간에 신호가 인터셉트되어도 정보가 유출되지 않는다. b/c 해당 정보는 비밀키 B키로 복호화해야 볼 수 있기 때문.

3) 웹 서버에서 B 키를 이용해서 정보를 복호화해서 받는다/저장한다 등등.

19-3. 다른 컴퓨터에서 내 웹 서버에 연결하는 방법

이론적으로는 웹 브라우저와 웹 서버를 각각 담당할 컴퓨터 두 대가 필요하지만,

우리에게는 '스마트폰'이라는 작은 컴퓨터가 있다!

그러면, 스마트폰에서 뭐라고 입력해야 내 컴퓨터의 웹서버에 연결할 수 있을까?

: 내 컴퓨터의 웹서버의 IP주소가 필요하다!

IP주소 알아보는 방법

1) 내 컴퓨터가 연결된 와이파이->와이파이 옆의 '속성' 클릭

2) 아래로 내리다 보면 'IPv4 주소' 가 뜬다. 

이렇게!

즉 http와 함께 192.168.0.8 을 입력하고, 그 뒤에 해당 웹서버에서 불러오고 싶은 파일명을 입력하면,

실제 웹서버(=내 컴퓨터)에서 웹 브라우저(=스마트폰)로 해당 정보를 전송시켜 준다!

지금은 http://192.168.0.8/index.html 을 입력했다.


+ 그런데 로딩 시간이 너무 걸렸다.

=> 실제로는 이론처럼 간단하지 않다. 웹 브라우저가 웹 서버와 같은 와이파이를 공유해야 하고, 등등...

그래서 전 세계의 모든 사람들이 내 웹페이지에 이런 IP주소만 알면 접속할 수 있게 하는 방법은 한계가 있다.


+ 사이트 주소가 HTTP 형태로, 정보 보안에 취약하다.

Q. 대부분은 HTTPS 주소를 사용한다던데, 어떻게 하는 걸까? 유료?

#. HTML 태그 공부

32개의 자주 사용되는 태그들 중에서, 내가 아는 것과 모르는 것을 정리해 보았다:

www.advancedwebranking.com/html/

사용방법을 조금이라도 아는 태그 모르는 태그 + 처음 들어본 태그
<html>, <head>, <body>, <title>, <a>, <img>, <p>,
<li>, <ul>, <br>, <h2>, <h1>, <h3>, <strong>
<meta>, <div>, <script>, <link>, <span>, <style>, <input>, <form>, <nav>, <footer>, <header>, <iframe>, <button>, <i>

오늘은 이 태그들을 어떻게 사용하는지와 그 사용예시를 살펴보자!


#1. <meta> 태그

생활코딩의 HTML 사전에서 <meta>태그의 정보를 보면,

"meta요소는 title, base, link, style, script 요소로 표현할수 없는 다양한 종류의 메타데이터를 표현합니다." 라고 나온다.

그러면 title, base, link, style, script 요소는 무엇인가? 

<title> 태그는 웹페이지의 제목을 나타내는 걸 알고 있으니, <base> 태그가 뭔지를 알아보았다.


<base>태그:

웹 주소의 기준이 되는 base URL을 정의하는 태그란다.

base URL 이 뭔가?

처음에 웹사이트에 접속하면 보통 메인 페이지가 나온다. 이후 다른 항목들을 눌러서 여러 웹페이지로 이동하면, 주소의 앞부분은 그대로 있고 뒷부분에 다른 주소가 추가된다.

즉 여기서 '주소의 변하지 않는 앞부분' 을 base URL 이라고 한다!


base 태그에는 href 부분과 target 부분이 있다.

1) href 부분은 target 부분과 href 


예시 코드이다:

<head>
  <base href="https://www.w3schools.com/" target="_blank">
</head>

<body>
<img src="images/stickman.gif" width="24" height="39" alt="Stickman">
<a href="tags/tag_base.asp">HTML base Tag</a>
</body>


'front-side > HTML' 카테고리의 다른 글

새로운 태그 공부  (0) 2021.03.23
HTML 정리편#1 - 복습  (0) 2021.03.23
웹 페이지 완성 ~ 원시 웹  (0) 2021.03.19

#15. 웹 페이지 완성

1. 웹 페이지의 개념

지금까지 하나의 웹 페이지를 구성하는 코드 여러 개를 배웠다.

화려하고 복잡하진 않아도 이 코드만으로도 웹페이지를 구성하는 것은 가능하다!

※ 그런데, '웹 페이지'를 구성했다고 했지 아직 '웹 사이트'를 구성한 것은 아니다.

=> 웹 페이지와 웹 사이트는 무슨 차이가 있나?


웹 페이지 = 책의 한 페이지라면,

웹 사이트 = 완성된 책 한 권 이다.

즉 '여러 개의 웹 페이지'가 서로 '연결(link)'되어야 비로소 웹 사이트가 구성되는 것이다.


다음의 예시를 보자:


<html>
	<head>
    	<meta charset="utf=8">
        <title>Lunch</title>
    </head>
    <body>
    	<h1>Menu</h1>
        	<ol>
        		<li><a href="https://starbucks.co.kr/" target="_blank">Coffee</a></li>
            		<li><a href="https://subway.co.kr/" target="_blank">Sandwich</a></li>
            		<li><a href="https://outback.co.kr/" target="_blank">Steak</a></li>
            		<li><a href="https://momstouch.co.kr/" target="_blank">Burger</a></li>
            		<li><a href="http://www.baskinrobbins.co.kr/" target="_blank">Ice Cream</a></li>
            </ol>
    </body>
</html>

다음은 내가 좋아하는 점심메뉴를 나타낸 HTML 코드이다.


현재 페이지를 메인 페이지라고 치면, Coffee, Sandwich, ... , Ice Cream 이라는 또 다른 다섯 개의 웹페이지가 이 메인 페이지와 연결되어 있는 것이다. 각각의 페이지에 <a> 태그로 하이퍼링크를 걸어서 여러 페이지를 연결시킬 수 있다!


2. 웹 페이지 예시

하지만 위의 코드는 실제로 저 웹페이지들을 서로 연결시킬 순 없으므로, 다른 예시를 만들어 보았다.

보통 index.html 파일을 홈페이지의 메인 페이지로 사용하는 것 같다!

아래 예시의 경우, index.html -> 메인 페이지, 그리고 나머지를 머신러닝의 세 종류를 설명하는 파일들인 1.html, 2.html, 3.html  파일로 각각 구성해 보았다.


index.html 페이지

<!DOCTYPE html>
<html lang="en" dir="ltr">
  <head>
    <meta charset="utf-8">
    <title>IT-ML</title>
  </head>
  <body>
    <h1><a href="index.html">IT</a></h1>
    <ol>
    <li> <a href="1.html">  Supervised Learning</a>
    <li> <a href="2.html">  Unsupervised Learning</a>
    <li> <a href="3.html">  Reinforcement Learning</a>
    </ol>
    <h2>Useful Sites</h2>
      <h3>First Web</h3>
      <a href="http://info.cern.ch" target="_blank">PRIMITIVE WEB</a>
      <h3>Free Images without Copyright</h3>
        <a href="https://unsplash.com/" target="_blank">UNSPLASH</a>
        <h3>HTML specification</h3>
        <a href="https://www.w3schools.com/" target="_blank">W3SCHOOLS</a>
    <h2>Machine Learning</h2>
      <p>
        Machine learning (ML) is the study of computer algorithms that improve automatically through experience and by the use of data.[1] It is seen as a part of artificial intelligence. Machine learning algorithms build a model based on sample data, known as "training data", in order to make predictions or decisions without being explicitly programmed to do so.[2] Machine learning algorithms are used in a wide variety of applications, such as email filtering and computer vision, where it is difficult or unfeasible to develop conventional algorithms to perform the needed tasks. <br><br> A subset of machine learning is closely related to computational statistics, which focuses on making predictions using computers; but not all machine learning is statistical learning. The study of mathematical optimization delivers methods, theory and application domains to the field of machine learning. Data mining is a related field of study, focusing on exploratory data analysis through unsupervised learning.[4][5] In its application across business problems, machine learning is also referred to as predictive analytics.
      </p>
  </body>
</html>

1.html 페이지

<!DOCTYPE html>
<html lang="en" dir="ltr">
  <head>
    <meta charset="utf-8">
    <title>IT-Supervised</title>
  </head>
  <body>
    <h1><a href="index.html">IT</a></h1>
    <ol>
    <li> <a href="1.html">  Supervised Learning</a>
    <li> <a href="2.html">  Unsupervised Learning</a>
    <li> <a href="3.html">  Reinforcement Learning</a>
    </ol>
    <h2>Supervised Learning</h2>
      <p>
      Supervised learning is the machine learning task of learning a function that maps an input to an output based on example input-output pairs.[1] It infers a function from labeled training data consisting of a set of training examples.[2] In supervised learning, each example is a pair consisting of an input object (typically a vector) and a desired output value (also called the supervisory signal). A supervised learning algorithm analyzes the training data and produces an inferred function, which can be used for mapping new examples. An optimal scenario will allow for the algorithm to correctly determine the class labels for unseen instances. This requires the learning algorithm to generalize from the training data to unseen situations in a "reasonable" way (see inductive bias). This statistical quality of an algorithm is measured through the so-called generalization error.[3]
      </p>
  </body>
</html>

2.html 페이지

<!DOCTYPE html>
<html lang="en" dir="ltr">
  <head>
    <meta charset="utf-8">
    <title>IT-Unsupervised</title>
  </head>
  <body>
    <h1><a href="index.html">IT</a></h1>
    <ol>
    <li> <a href="1.html">  Supervised Learning</a>
    <li> <a href="2.html">  Unsupervised Learning</a>
    <li> <a href="3.html">  Reinforcement Learning</a>
    </ol>
    <h2>Unsupervised Learning</h2>
      <p>
      Unsupervised learning (UL) is a type of algorithm that learns patterns from untagged data. The hope is that through mimicry, the machine is forced to build a compact internal representation of its world. In contrast to supervised learning (SL) where data is tagged by a human, e.g. as "car" or "fish" etc, UL exhibits self-organization that captures patterns as neuronal predelections or probability densities.[1] The other levels in the supervision spectrum are reinforcement learning where the machine is given only a numerical performance score as its guidance, and semi-supervised learning where a smaller portion of the data is tagged. Two broad methods in UL are Neural Networks and Probabilistic Methods.
      </p>
  </body>
</html>

3.html 페이지

<!DOCTYPE html>
<html lang="en" dir="ltr">
  <head>
    <meta charset="utf-8">
    <title>IT-Reinforcement</title>
  </head>
  <body>
    <h1><a href="index.html">IT</a></h1>
    <ol>
    <li> <a href="1.html">  Supervised Learning</a>
    <li> <a href="2.html">  Unsupervised Learning</a>
    <li> <a href="3.html">  Reinforcement Learning</a>
    </ol>
    <h2>Reinforcement Learning</h2>
      <p>
        Reinforcement learning (RL) is an area of machine learning concerned with how intelligent agents ought to take actions in an environment in order to maximize the notion of cumulative reward.[1] Reinforcement learning is one of three basic machine learning paradigms, alongside supervised learning and unsupervised learning.
        <br><br>
        Reinforcement learning differs from supervised learning in not needing labelled input/output pairs be presented, and in not needing sub-optimal actions to be explicitly corrected. Instead the focus is on finding a balance between exploration (of uncharted territory) and exploitation (of current knowledge).[2]
        <br><br>
        The environment is typically stated in the form of a Markov decision process (MDP), because many reinforcement learning algorithms for this context use dynamic programming techniques.[3] The main difference between the classical dynamic programming methods and reinforcement learning algorithms is that the latter do not assume knowledge of an exact mathematical model of the MDP and they target large MDPs where exact methods become infeasible.
      </p>
  </body>
</html>


이처럼 위에 <ol>과 <li> 태그로 목차를 표시하고 <a> 태그로 하이퍼링크를 걸어 주면, 언제든지 다른 페이지에서도 또 다른 페이지로 쉽게 이동할 수 있다.


#16. 원시웹

1. 웹과 인터넷의 개념

이번 강의는 쉬어가는 강의. '원시웹'의 역사를 알아보았다.

현재의 웹은 아주 복잡해서, 초보자가 그 구조를 파악하거나 어떤 공간인지 쉽게 알기 어렵다.

그래서 초기의 웹을 보았다. 가장 초기의 웹은 웹의 본질만 있고, 부가적이고 편리하며 때론 복잡한 여러 기능들이 아직 추가되지 않았을 때의 모습일 것이다.


그렇다면 웹을 웹으로 만드는 그 본질은 무엇일까?

그러려면 웹이 무엇인지부터 알아봐야 한다.

때론 의미가 모호한 여러 용어들이 있는데, 나한테는 인터넷과 웹이 그랬다.

인터넷과 웹은 다를까? 다르다.

더보기

인터넷 : 여러 자동차가 있는 도로.

웹 : 도로 위의 자동차 하나.

인터넷은 '공간'이다. 구체적으로는 정보를 주고받을 수 있는 공간이다.

그런데 웹도 '공간'이다. 다만 인터넷은 email, FTP 등 웹과 다른 역할을 하는 공간들도 포함하는 개념이다.

(더 자세하게 인터넷의 개념을 이해하려면 email, FTP 등은 어떻게 웹과 다르고 인터넷에는 포함되는지를 알아보면 좋을 것 같다!)


2. 웹의 대중화

웹은 원래 소수의 엘리트 집단과 거대한 기관에서만 사용되었다가, 1990년대 이후 대중에게 유행하면서 훨씬 더 편리하면서도 복잡해진 지금의 웹이 되었다고 한다.


=> 지금은 소수 집단에서 쓰이고 있지만 웹처럼 미래에는 대중이 널리 사용하게 될 것들이 또 있을 수 있다.


'front-side > HTML' 카테고리의 다른 글

새로운 태그 공부  (0) 2021.03.23
HTML 정리편#1 - 복습  (0) 2021.03.23
18. 웹호스팅 ~ 19. 웹서버 운영하기 + HTML 태그 공부  (0) 2021.03.22

+ Recent posts